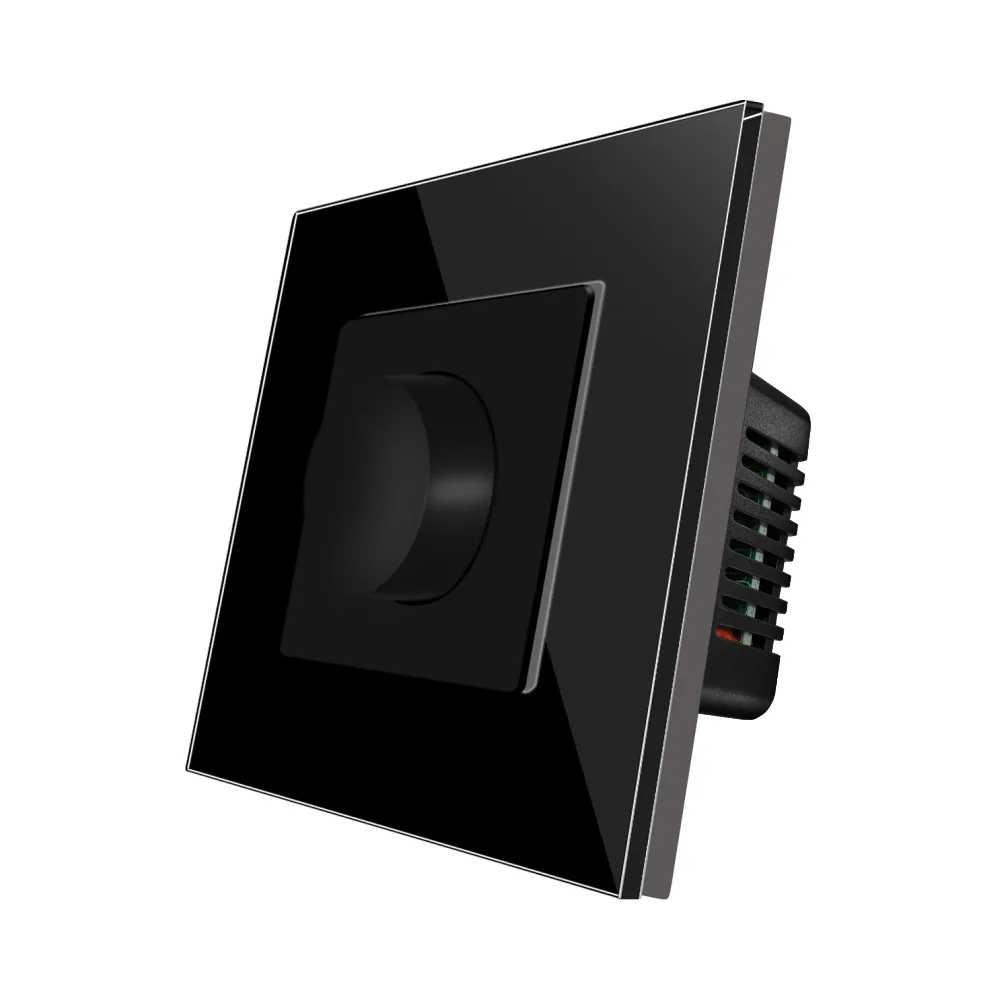
LUXION mechanical dimmer switch with glass frame
LUXION mechanical dimmer switch with glass frame for adjusting light intensity, up to 500W resistive and 80W LED load.
Code: LX-MP-DM01GF-B · Colour: Black
Datasheet (PDF)| Colour | Code | Blister code | EAN |
|---|---|---|---|
| Black | LX-MP-DM01GF-B | LXD-MP-DM01GF-B | 7301844303405 |
| Gold | LX-MP-DM01GF-G | LXD-MP-DM01GF-G | 8520621467959 |
| Grey | LX-MP-DM01GF-GY | LXD-MP-DM01GF-GY | 9427141545008 |
| White | LX-MP-DM01GF-W | LXD-MP-DM01GF-W | 3691369199848 |
Description
LUXION mechanical switches stand out for their compact, elegant and minimalist design. They are practical, made from quality materials and built to last, offering functionality and comfort in your home.
The mechanical dimmer switch with glass frame lets you adjust the lighting intensity in your room, simply using the side knob of the mechanism.
- Light intensity adjustment via side knob
- Suitable for halogen and incandescent bulbs up to 500W and dimmable LED up to 80W
- Glass frame for a clean, modern look
- Service life of 100,000 operations
Features
Enjoy the versatility of the new Luxion switches: a mechanical dimmer switch with glass frame, in a compact, elegant and minimalist design.
- Adjustable light intensity in the room
- Intensity adjusted with the side knob
- Service life of 100,000 operations
Compatible bulbs
- Halogen and incandescent bulbs: up to 500W
- Dimmable LED: up to 80W
- Dimmable LED CFL: up to 400W
- Minimum dimmable LED bulb power: >5W
Technical parameters
- Operating voltage: 220V AC
- Load: resistive 500W, LED 80W
- Operating temperature: -20 ~ +70 °C
- Relative humidity: 10% ~ 93%
Structure / components
- Glass frame
- Dimmer mechanism
- Metal mounting frame
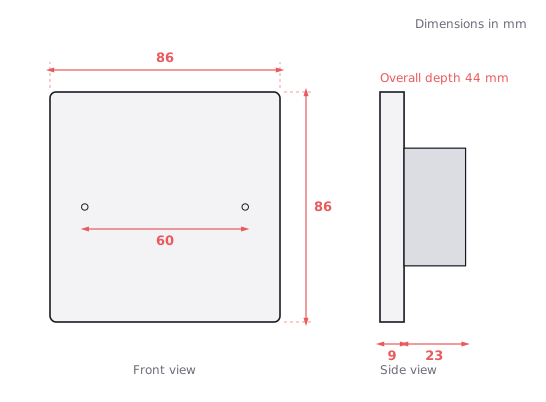
- Screw fixing, screw spacing 60 mm
Dimensions
- Width: 86 mm
- Height: 86 mm
- Frame thickness: 9 mm
- Mechanism depth: 23 mm
- Mechanism height: 44 mm
- Knob: 12 mm
Installation / wiring diagram
Connect the live (L) to terminal L and the light fitting to terminal L1; the other wire of the light fitting connects to the neutral (N). Caution: switch off the power supply during installation and removal.
- 1. Open the package.
- 2. Connect the wires and tighten the screws.
- 3. Use the 2 screws to fix the frame.
- 4. Fit the front cover.
Dimension drawing